
Chicken Pot Pie
I’ll tell you the exact moment I fell in love with chicken pot pie. I’d been out of the Navy for about six months, my wife was working late, and I had two kids staring at me expecting dinner. I grabbe
Ingredients
For the filling
- 3 cups shredded rotisserie chicken
- 4 tablespoons butter
- 1 medium yellow onion (diced)
- 2 carrots (peeled and diced)
- 2 stalks celery (diced)
- 3 cloves garlic (minced)
- 1/3 cup all-purpose flour
- 1.5 cups chicken broth
- 3/4 cup whole milk (or half-and-half for richer filling)
- 1 cup frozen peas
- 1 teaspoon dried thyme
- salt and pepper to taste
For the crust
- 2 store-bought pie crusts (or homemade — your call)
- 1 egg beaten with 1 tablespoon water (egg wash)
Method
Step 1: Make the filling
-
Preheat oven to 400°F. Melt butter in a large skillet or saucepan over medium heat. Add the onion, carrots, and celery. Cook for about 5-6 minutes until softened. Add garlic and cook another 30 seconds.
-
Sprinkle the flour over the vegetables and stir for about a minute — you’re building a roux here, same as you would for gravy. Slowly pour in the chicken broth while stirring, then add the milk. Keep stirring until it thickens into a creamy sauce, about 3-4 minutes.
-
Fold in the shredded chicken and frozen peas. Season with thyme, salt, and pepper. Let the filling cool for about 15-20 minutes. This step matters — hot filling melts the butter in your pie crust too fast and you end up with a soggy bottom.
Step 2: Assemble the pie
-
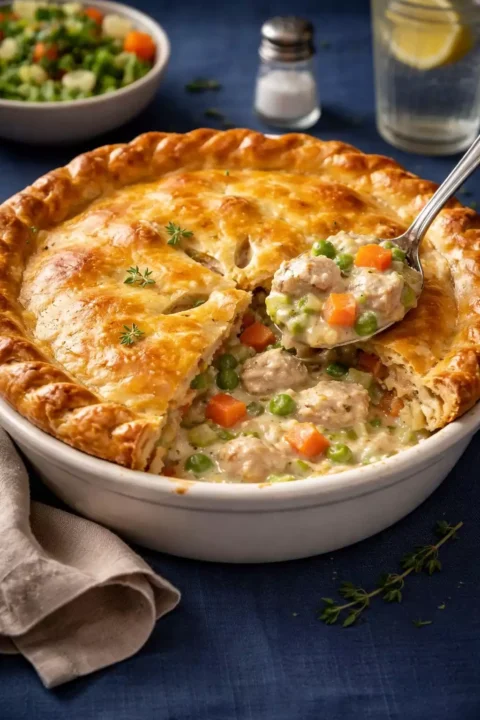
Press one pie crust into a 9-inch pie plate. Pour the cooled filling in. Lay the second crust on top and crimp the edges with a fork or pinch them together. Cut 3-4 slits in the top crust so steam can escape. Brush with egg wash for that golden, glossy finish.
Step 3: Bake
-
Bake at 400°F for 15 minutes, then reduce to 375°F and bake for another 20-25 minutes until the crust is deep golden brown and the filling is bubbling through the vents. If the edges get too dark, tent them with foil.
-
Let it rest for at least 15 minutes before cutting. I know it’s hard, but the filling needs time to set up. If you cut it immediately, it’ll run everywhere.


Off the Galley Mike
Mike — Off The Galley
Six years as a Navy cook on submarines and destroyers, feeding 130 sailors from a galley the size of your bathroom. Now I cook the same big-flavor, no-nonsense food for my family of four — and share every recipe here. No culinary school. No fancy plating. Just real food that works, tested on the toughest critics afloat and the pickiest ones at home.
Chicken Pot Pie — Golden Crust, Creamy Filling, Zero Leftovers
I‘ll tell you the exact moment I fell in love with chicken pot pie. I’d been out of the Navy for about six months, my wife was working late, and I had two kids staring at me expecting dinner. I grabbed a rotisserie chicken from the store, found pie crust in the fridge, and scraped together what we had. That improvised pot pie turned out so good that my daughter asked for it again the next night.
That’s the thing about pot pie — it looks like a big production, but it’s really just creamy chicken soup with a crust on top. Once you understand that, it stops being intimidating.
The Rotisserie Chicken Shortcut
Look, I’m not above shortcuts. On a submarine, we used whatever got the job done as long as the food tasted good. A grocery store rotisserie chicken is one of the best hacks in home cooking. The chicken is already seasoned, already cooked, and already falling apart. Just shred it and you’ve saved yourself 45 minutes.
If you want to cook your own chicken, go ahead — boil some bone-in thighs or bake some breasts. But don’t let “I don’t have time to cook chicken” stop you from making this. The rotisserie version is outstanding.
Crust Situation
I’m going to say something that might be controversial: store-bought pie crust is perfectly fine for pot pie. Is homemade better? Yes, if you’ve got the time and patience. But I’ve made this with Pillsbury refrigerated crust probably thirty times and nobody has ever complained. Not once.
If you do make your own, you need flour, butter, a little salt, and ice water. Cut cold butter into flour until it looks like coarse sand, add ice water a tablespoon at a time until the dough comes together, wrap it up and chill for at least an hour. The key is keeping everything cold — cold butter creates flaky layers.
You need two crusts — one for the bottom, one for the top. If you want to keep it even simpler, skip the bottom crust entirely and just do a top crust. Still works, still delicious, and you avoid the soggy bottom problem.
Ingredients
For the filling: 3 cups shredded rotisserie chicken, 4 tablespoons butter, 1 medium yellow onion (diced), 2 carrots (peeled and diced), 2 stalks celery (diced), 3 cloves garlic (minced), 1/3 cup all-purpose flour, 1.5 cups chicken broth, 3/4 cup whole milk (or half-and-half for richer filling), 1 cup frozen peas, 1 teaspoon dried thyme, salt and pepper to taste.
For the crust: 2 store-bought pie crusts (or homemade — your call), 1 egg beaten with 1 tablespoon water (egg wash).
How to Make It
1
1Make the filling
Preheat oven to 400°F. Melt butter in a large skillet or saucepan over medium heat. Add the onion, carrots, and celery. Cook for about 5-6 minutes until softened. Add garlic and cook another 30 seconds.
Sprinkle the flour over the vegetables and stir for about a minute — you’re building a roux here, same as you would for gravy. Slowly pour in the chicken broth while stirring, then add the milk. Keep stirring until it thickens into a creamy sauce, about 3-4 minutes.
Fold in the shredded chicken and frozen peas. Season with thyme, salt, and pepper. Let the filling cool for about 15-20 minutes. This step matters — hot filling melts the butter in your pie crust too fast and you end up with a soggy bottom.
2
2Assemble the pie
Press one pie crust into a 9-inch pie plate. Pour the cooled filling in. Lay the second crust on top and crimp the edges with a fork or pinch them together. Cut 3-4 slits in the top crust so steam can escape. Brush with egg wash for that golden, glossy finish.
3
3Bake
Bake at 400°F for 15 minutes, then reduce to 375°F and bake for another 20-25 minutes until the crust is deep golden brown and the filling is bubbling through the vents. If the edges get too dark, tent them with foil.
Let it rest for at least 15 minutes before cutting. I know it’s hard, but the filling needs time to set up. If you cut it immediately, it’ll run everywhere.
Tips That Make a Difference
Cool the filling before assembling. Hot filling equals soggy crust. Give it at least 15 minutes.
Use thigh meat if cooking your own. Breasts dry out in pot pie. Thighs stay juicy and have more flavor.
Don’t skip the egg wash. It’s the difference between a pale, matte crust and a gorgeous, golden, bakery-looking one. Takes 10 seconds.
Add frozen peas last. Stir them into the hot filling and they’ll thaw on contact. Cooking them before that turns them into sad little green mushballs.
Variations
Individual pot pies: Divide filling into ramekins, top each with a round of pie crust, and bake. Looks impressive, and everyone gets their own crust-to-filling ratio. My kids love these.
Biscuit-topped: Skip the pie crust and drop biscuit dough on top of the filling in a skillet. Bake until the biscuits are golden. Different texture, equally good.
Turkey pot pie: Swap chicken for leftover turkey after the holidays. Same recipe, same technique, zero waste.
What to Serve With It
Pot pie is already a full meal — protein, vegetables, and carbs all in one package. But a simple green salad on the side cuts through the richness nicely. Mashed potatoes are technically overkill with the crust already there, but I’ve done it and I’m not sorry about it.
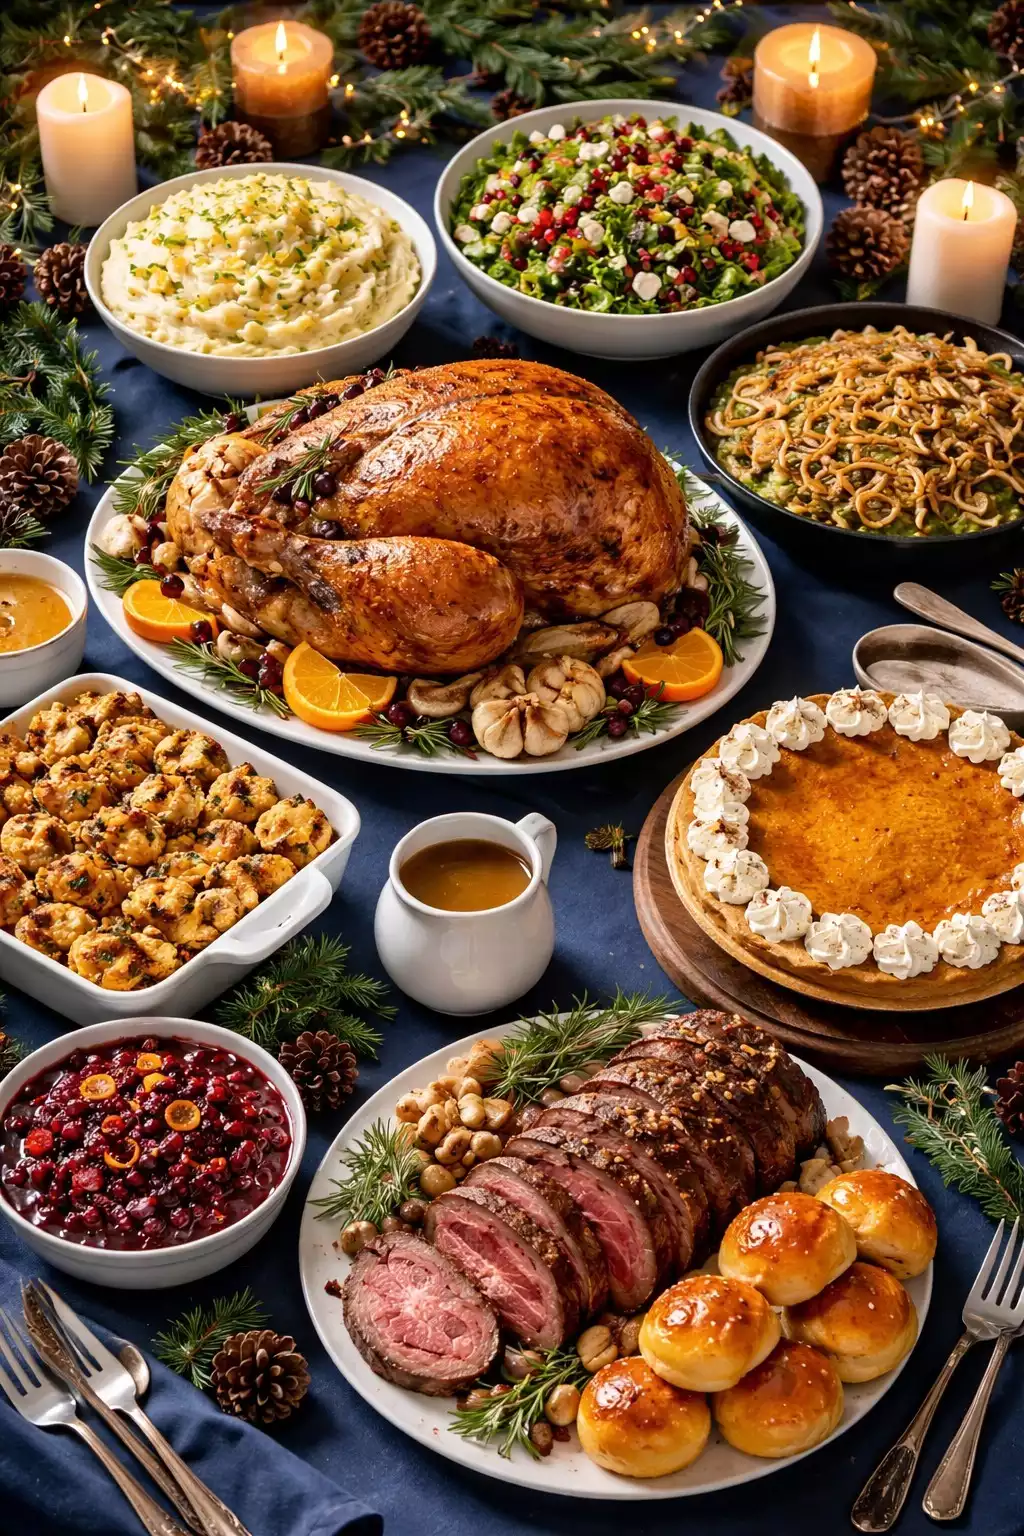
For a bigger dinner spread, pair it with chicken and dumplings and meatloaf — which yes, is a lot of food, but that’s never been a problem in this house.
The Crust Debate: Homemade vs Store-Bought
I’ll be real with you — I use store-bought pie crust about 80% of the time for pot pie. Not because I can’t make crust from scratch. I can. But on a weeknight when I’m also helping with homework and keeping the dog from eating the cat’s food, I’m not rolling out pastry dough from scratch. That’s just the reality.
When I do make homemade crust, it’s because we have company or it’s a weekend and I want the whole experience. The difference is noticeable — homemade is butterier, flakier, and has a more golden color. But store-bought gets you 90% of the way there with about 10% of the effort.
The one thing I will say is this: if you use store-bought, let it come to room temperature before unrolling it. Cold crust cracks. Every time. Read the package, follow the instructions, and you’ll be fine.
Make It a Weeknight Meal
The full version of chicken pot pie takes about an hour from start to finish. If that feels like a lot for a Tuesday, here’s how I speed it up: use rotisserie chicken (no cooking), store-bought pie crust (no rolling), and frozen mixed vegetables (no chopping). The filling comes together in about 15 minutes, and bake time is 35 minutes. That’s under an hour with almost no prep.
On weeknights, I sometimes skip the bottom crust entirely and just pour the filling into a pie plate with a top crust. Fewer dishes, faster assembly, and honestly? Nobody in this house has ever said “I wish this pot pie had more crust on the bottom.”
Storage
Leftover pot pie keeps in the fridge for 3-4 days. Cover the plate with foil and reheat in a 350°F oven for about 15-20 minutes. The microwave works but the crust loses its crispness.
I don’t love freezing a fully assembled and baked pot pie — the crust goes soggy. But you can absolutely freeze the filling by itself for up to 3 months, thaw it, and assemble a fresh pie when you’re ready.
Frequently Asked Questions
Can I make this ahead of time?
Yes. Assemble the whole pie (with cooled filling), cover with plastic wrap, and refrigerate for up to 8 hours. Let it sit at room temperature while the oven preheats, then bake as directed.
Why is my bottom crust soggy?
The filling was too hot when you poured it in, or the pie sat too long before baking. Cool the filling first, and get it into the oven as soon as it’s assembled.
Can I use puff pastry instead of pie crust?
Yes, and it’s really good — lighter and flakier. Just use it for the top crust only, since puff pastry doesn’t hold up well on the bottom. Bake according to the puff pastry package directions.
How do I know when it’s done?
The crust should be deep golden brown, not pale gold. You should see filling bubbling up through the vents in the top crust. If you have a thermometer, the center of the filling should be at least 165°F.
More From Off The Galley
Classic Meatloaf · Chicken And Dumplings · Beef Pot Roast · Biscuits And Gravy · Crunchwrap Supreme

Off the Galley Mike
Mike — Off The Galley
Six years as a Navy cook on submarines and destroyers, feeding 130 sailors from a galley the size of your bathroom. Now I cook the same big-flavor, no-nonsense food for my family of four — and share every recipe here. No culinary school. No fancy plating. Just real food that works, tested on the toughest critics afloat and the pickiest ones at home.